Mirror cake techniques revealed! Check out recipes, tips and don’t confuse mirror cake with glass cake!
Olga Noskova’s cakes continue to be popular and causing a stir on the internet. Unfortunately, they are confusing the mirror cake with the already launched glass cake.
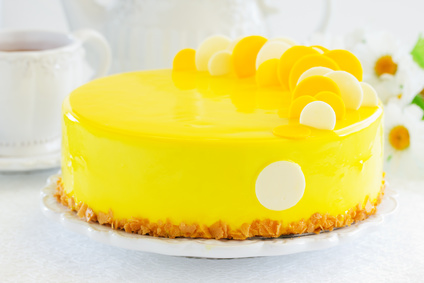
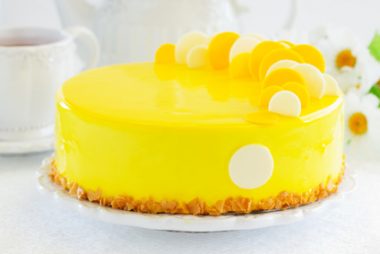
They are different cakes! The glass cake has a transparent icing (all made of gelatin) and you can see the finished cake. The mirror cake has frosting mirror effect, very shiny and not transparent. The secret to the shine of the mirror cake is the mirror icing; icing. Coverage so shiny it reflects your image.
Another type of coverage is velvety, which impresses with its perfection and beauty. The crackle effect coverage is also wonderful!
Chocolate Glaze
Ingredients
- 11.5 grams of unflavored gelatin powder
- 50 ml of cold water
- 210 grams of sugar
- 110 ml of water
- 65 ml of cream
- 65 grams of cocoa powder
- 50 grams of dark chocolate in pieces
Preparation Mode
- Hydrate the gelatin in water.
- In a pan, place the sugar, water, cream and cocoa powder and heat.
- When it boils, remove from the heat and add the chocolate, mixing until it melts completely.
- Add the gelatin and mix well.
- Use the mixer carefully so as not to form bubbles.
- Sift and, if necessary, sift again.
- Let it cool a little covered with plastic film against the top so that a skin does not form.
- When the icing is at the appropriate temperature, apply it to the cake or pie, which should already be well chilled.
Colored Glazing
Ingredients
- 150 grams of white corn glucose
- 150 grams of sugar
- 75 grams of water
- 100 grams of condensed milk
- 10 grams of unflavored gelatin powder
- 60 grams of water
- 150 grams of white chocolate
- 5 grams of fat-soluble yellow dye
Preparation Mode
- In a bowl, place the white chocolate and condensed milk. Reserve.
- In a pan, place the glucose, sugar and water.
- Cook over medium heat until it boils. Remove from heat.
- Place over the reserved white chocolate and mix well until all the chocolate melts.
- Beat with the mixer being careful not to incorporate air bubbles.
- Add the coloring and beat again until you get a homogeneous mixture.
- Sift and use.
Mom Tips
Attention! It is very important to use the exact amount of ingredients to be successful in your recipes.
Assemble the cake or pie on a base of the same size.
The pie or cake must have at least two fillings that match each other. The cake or pie must be completely covered with chocolate mousse or another type of cream and then covered with icing.
Once ready, the cake or pie must be super cold before the icing can be applied. You can leave the cake/pie in the freezer for almost 2 hours. Remove and apply the frosting.
The dye can be any color you prefer.
You can use titanium dioxide food coloring powder. The use of this coloring is recommended to enhance colors in the toppings of fine confectionery. Dye plus titanium dioxide leave your coverage with the desired color and much more vivid and crystallized.
The icing does not interfere with the flavor of the cake or pie and is not dry to the touch, therefore, it is not recommended for covering chocolates.
So that your icing doesn’t have lumps and bubbles, beat it with the mixer and pass it through a sieve.
This coverage must be at a temperature between 30 and 35ºC. If you don’t have a culinary thermometer, try the frosting on your bottom lip like we do with melted chocolate.
If your pie is not completely frozen, use the frosting at 30ºC, that is, a little firmer.
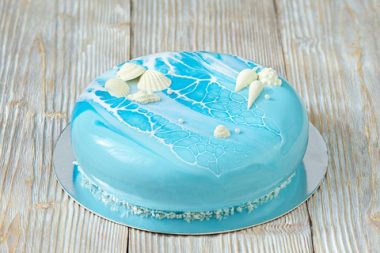
On a baking tray, place a frosting screen and place the cake or pie on the screen. Apply the frosting, always starting in the center of the cake or pie. It should run all over the cake, covering it completely, running towards the edges and consequently covering the sides, providing a smooth, perfect and impeccable finish.
Leftover coverage can be heated in a water bath for reuse in another preparation.
Technique unveiled: To obtain the velvety texture it is necessary to use a painting compressor (airbrush kit complete with micro compressor). For this type of texture, use the gun with a larger hole. The larger the beak, the larger the stitches that will give the velvet effect.
Technique unveiled: To obtain the crackled effect, immediately after icing, use a spatula to apply a mixture of gloss gel and white dye, previously heated (hot), to part of the top of the cake.
Always use quality products and ingredients to obtain excellent results.
See also the glass cake recipe – glass cake
Decorate the cake or pie as desired.
Source: https://www.receitasdemae.com.br/receitas/bolo-espelho-mirror-cake-e-tecnicas-desvendadas/

